10-Minute Light Upgrade: Converting a Recessed Light to a Pendant Light
Lighting is one of the most important elements of interior design. The right lighting makes it a lot easier to see and can set the tone or mood in a room!
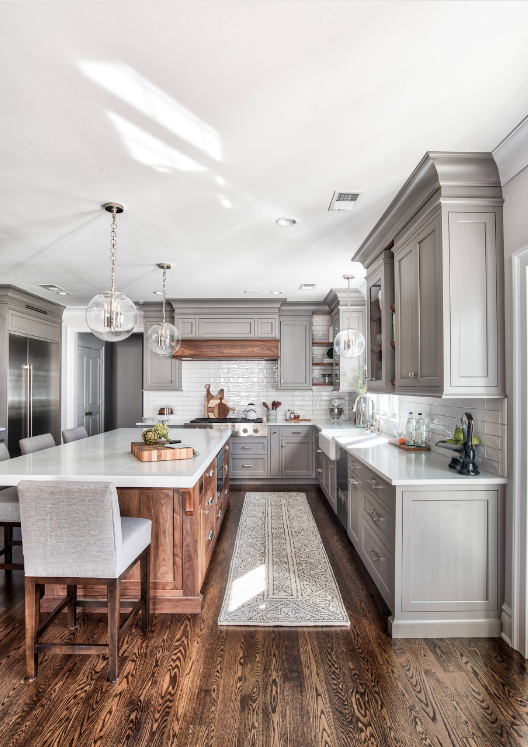
Photo By: Stonington Cabinetry & Designs
It also works to illuminate the colors, textures, and surfaces within the space. From decorative lighting (for highlight design elements or statement pieces) to task lighting (for making tasks like reading, cooking, etc. easier), the right amount and type of lighting can serve a multitude of purposes in interior design.
Recessed Lighting
Though there are plenty of lighting options for interior design, this post will specifically provide you with information on converting recessed lighting. For those who are unaware, recessed lights also referred to as can or canister lights are fixtures that are installed above the ceiling line.
If you were to look up at a recessed light, it would essentially look as if light were coming from a hole in the sky. Though this type of lighting can be ideal for homes with low ceilings, recessed lights aren’t very energy efficient, nor do they provide a great deal of illumination which is why some homeowners decide to upgrade them to pendant lights and other efficient fixtures.

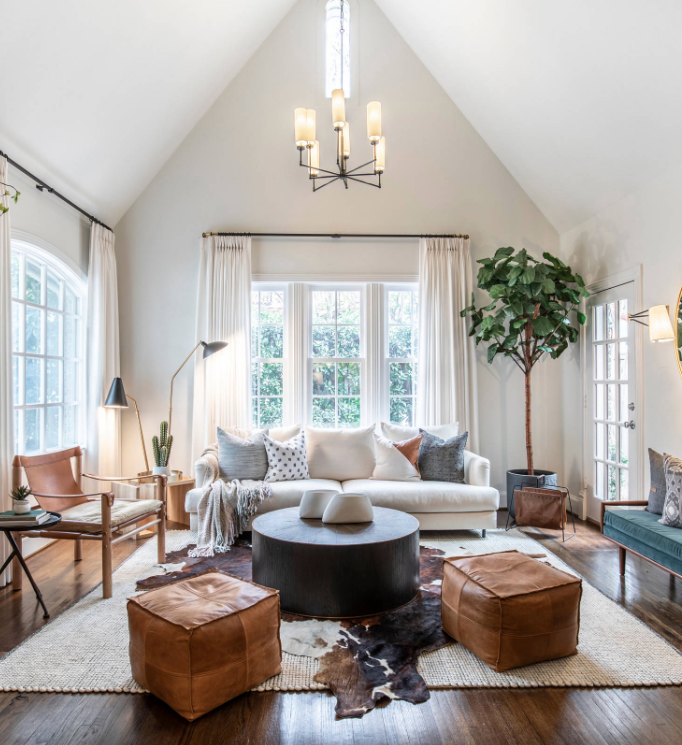
Photo By: Plain and Posh
Upgrading to Pendant Lighting
Pendant lighting is commonly chosen in home interior design. Much like a pendant on a necklace, these fixtures serve as a statement piece in any room. Ideal in kitchen, living room, dining room, and bedroom design, pendant lights come in all shapes and sizes. They suspend from the ceiling and can be used to add illumination to the room and/or highlight other design elements in a space. The best part is, it’s pretty easy to install yourself. Check out this simple step by step guide listed below:
Gather Your Supplies: To get started with your lighting upgrade you’ll need supplies that include a step ladder, a recessed lighting conversion kit (that has a socket adapter, adjustable bar, mounting bar, round metal plate, a medallion, and hardware), a power screwdriver, and a pendant light fixture.
Turn Off Power: When working with electricity it is important to be safe. Therefore, before you begin converting your recessed lights, make sure that you’ve turned the power source off to avoid electrocution.
Secure Ladder: As recessed lighting fixtures are installed in the ceiling, chances are you’ll need a ladder to complete the upgrade. For safety purposes, be sure that the ladder is secured and stationary to avoid falling and getting hurt.
Remove Recessed Light Fixture: Next, remove the recessed light fixture. Though this step will vary depending on the type of fixture you have, you will need to unscrew the lightbulb and then remove the decorative trim.
Install the Brace: After removing the old light fixture, grab the brace from your conversion kit. Be sure that the lock bar is in place on the brace and then screw the brace into your ceiling.
Attach the Mounting Bracket: Make sure the brace is secure so that your light fixture won’t wiggle or fall. Then, take the mounting bracket from your conversion kit and attach it to the brace using the power screwdriver.
Wires and Covers: Use a screw and attach the ground wire to the recessed light then, secure the round metal plate to the mounting plate.
Attach Mounting Bar: Now install the pendant light mounting bar to the mounting bracket.
Connecting Wires: Finally, string the wires from the pendant light through the decorative medallion and connect them to the wires from your conversion kit (see instruction manual to ensure you’re connecting the right wires together). Then, connect the pendant light to the socket and turn the power back on.
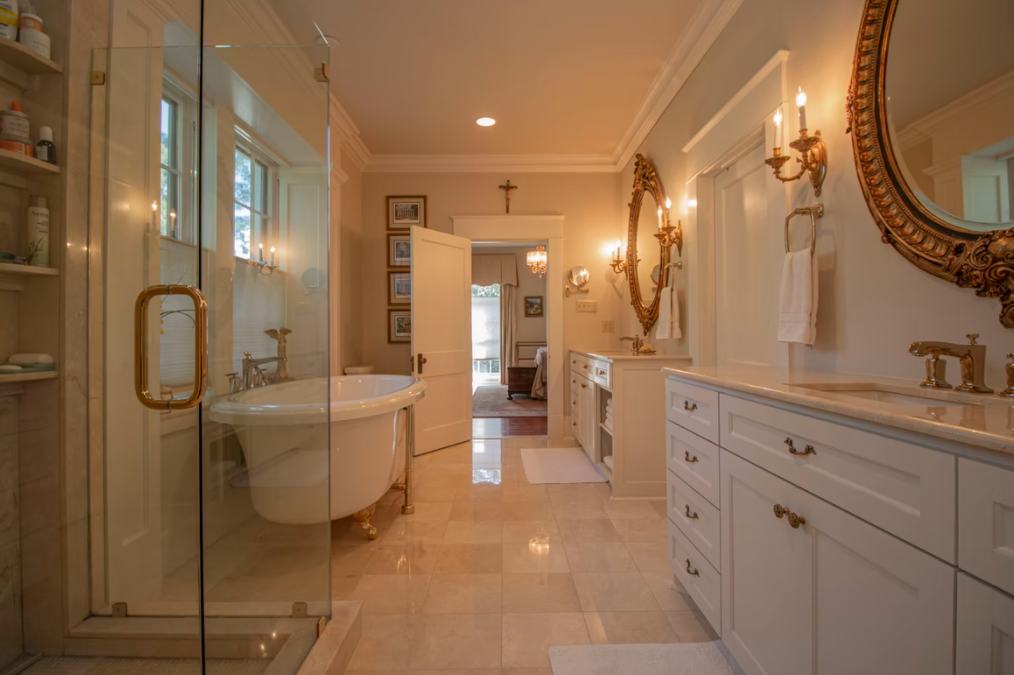
Photo By: Urbanology Designs
Whether you’re looking to add a wow factor to your home’s interior, improve the amount of light in a room, illuminate a new fixture or feature, improve functionality in a room, or save a few bucks on your energy bills, converting your recessed lights to pendant lights can help you to master this. Use this 10-minute guide along with your conversion kit instruction manual to ensure that you install your new lights accurately and safely.


Leave a Comment