HOME
DIY PROJECTS
HOME TOURS
MY ETSY SHOP ARTWORK
ABOUT
COLLAB / ADVERTISING
HOME
DIY PROJECTS
HOME TOURS
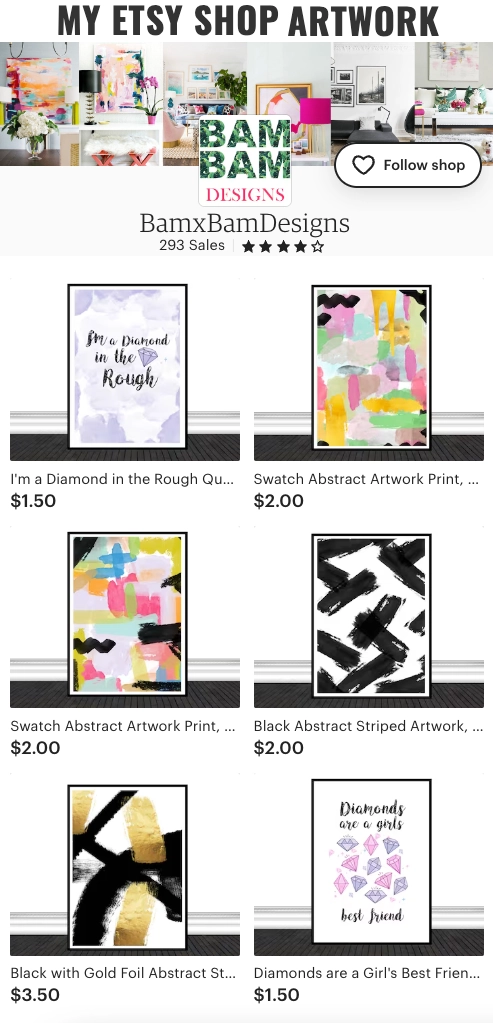
MY ETSY SHOP ARTWORK
ABOUT
COLLAB / ADVERTISING
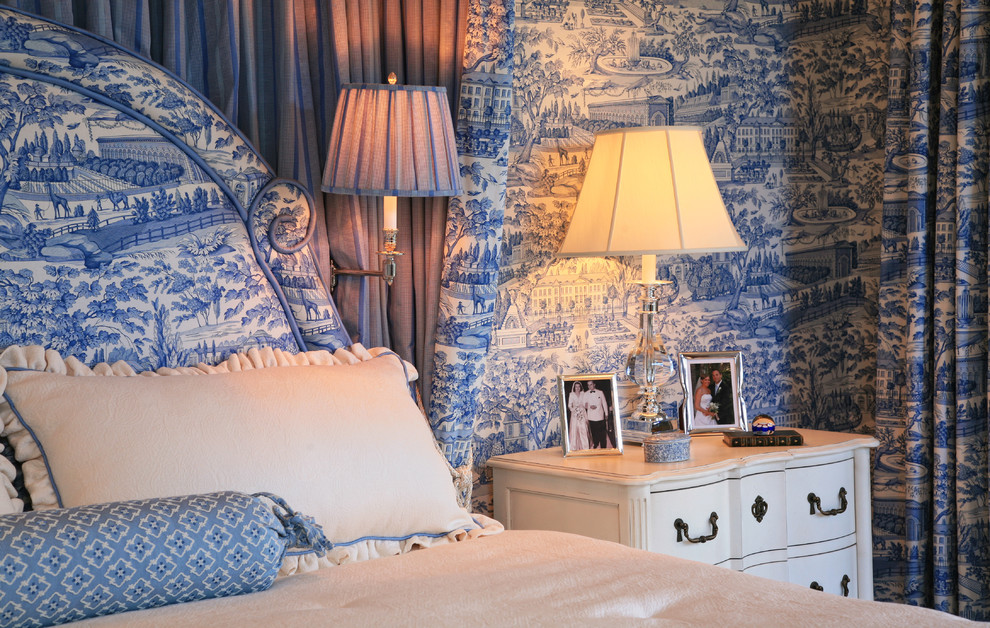
Bedrooms
1 Color, 1 Room! Check out How These Designers Made it Work!
May 7, 2013
by Better Decorating Bible
No Comments
I know in the 17th and 18th century, designers loved to design each room with one theme, and one color...
Share:
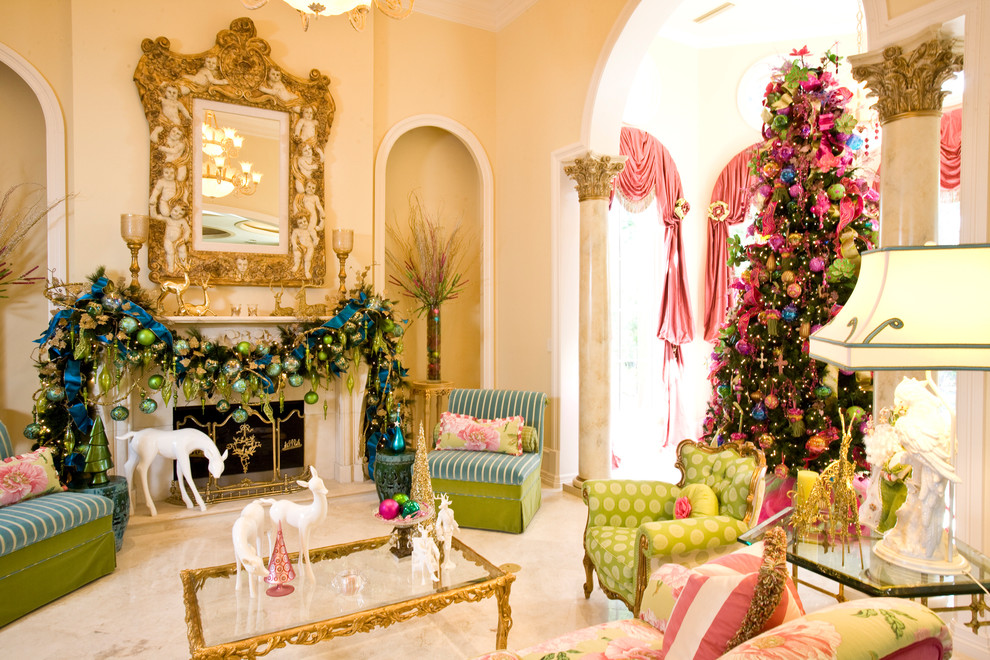
Living Rooms
Add Zing with Pink, Green, and Blue Christmas Décor
December 12, 2012
by Better Decorating Bible
2 Comments
Pink, green, and blue might seem like a surprising color combo but these lively hues contrast each other beautifully. Try...
Share:
Dining Rooms
,
Hallways
,
Living Rooms
Try Something New – Icy Blue Christmas Theme
December 3, 2012
by Better Decorating Bible
No Comments
Get cold when you see blue decor? Think again! I have always thought blue was a chilly color and tried...
Share:
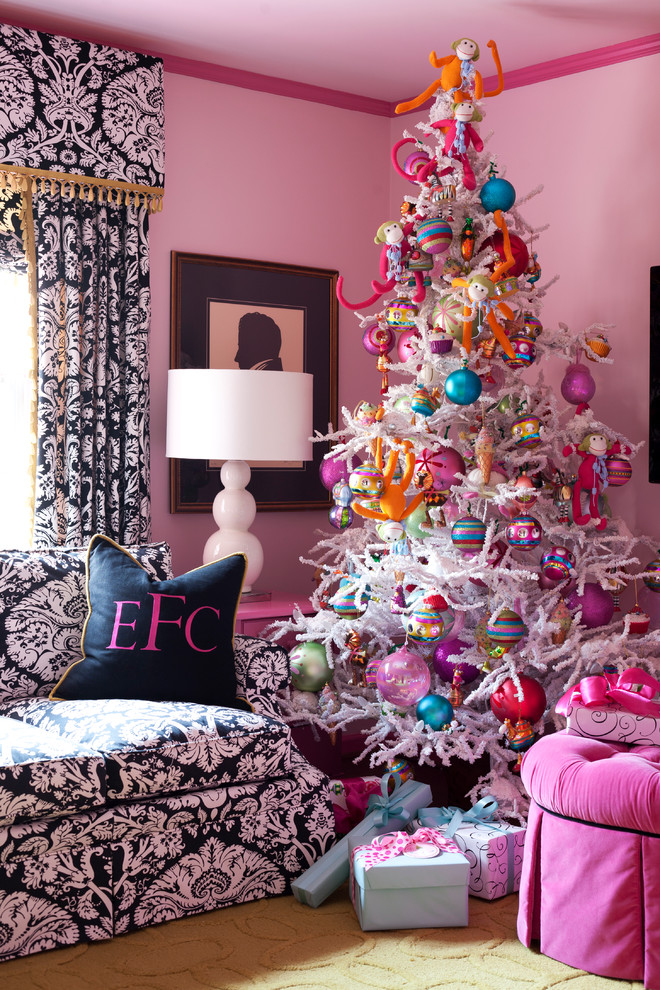
Living Rooms
It’s a Pink, Pink Christmas – This One is For the Girls
November 28, 2012
by Better Decorating Bible
2 Comments
FINALLY managed to get photos of this gorgeous room designed in pink, pink, and more pink! Forget classic Christmas colors...
Share:
Bedrooms
,
DIY
,
Hallways
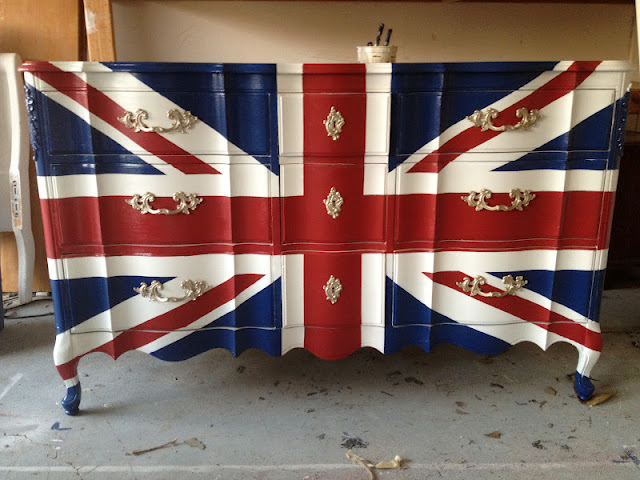
DIY Friday: To-Die-For Union Jack Dresser
August 3, 2012
by Better Decorating Bible
1 Comment
Make way for the perfect addition to your home: a funky union jack dresser which is totally DIY-able! This weekend...
Share:
Load more posts
SEARCH
KEEP READING MY OTHER BLOGS:
→
BetterHousekeeper.com
Housekeeping and DIY projects
→
ShopRoomIdeas.com
Home decorating
ideas
→
BetterBakingBible.com
Food, recipes, and kitchen decor
COLLABORATE WITH ME!
→ ADVERTISING
→ PRODUCT REVIEWS
→ GUEST FEATURES
CONTACT ME
HERE
Archives
Select Month
April 2024
March 2024
February 2024
January 2024
December 2023
November 2023
October 2023
September 2023
August 2023
July 2023
June 2023
May 2023
April 2023
March 2023
February 2023
January 2023
December 2022
November 2022
October 2022
September 2022
August 2022
July 2022
June 2022
May 2022
April 2022
March 2022
February 2022
January 2022
December 2021
November 2021
October 2021
September 2021
August 2021
July 2021
June 2021
May 2021
April 2021
March 2021
February 2021
January 2021
December 2020
November 2020
October 2020
September 2020
August 2020
July 2020
June 2020
May 2020
April 2020
March 2020
February 2020
January 2020
December 2019
November 2019
October 2019
September 2019
August 2019
July 2019
June 2019
May 2019
April 2019
March 2019
February 2019
January 2019
December 2018
November 2018
October 2018
September 2018
August 2018
July 2018
June 2018
May 2018
April 2018
March 2018
February 2018
January 2018
December 2017
November 2017
October 2017
September 2017
August 2017
July 2017
June 2017
May 2017
April 2017
March 2017
February 2017
January 2017
December 2016
November 2016
October 2016
September 2016
August 2016
July 2016
June 2016
May 2016
April 2016
March 2016
February 2016
January 2016
December 2015
November 2015
October 2015
September 2015
August 2015
July 2015
June 2015
May 2015
April 2015
March 2015
February 2015
January 2015
December 2014
November 2014
October 2014
September 2014
August 2014
July 2014
June 2014
May 2014
April 2014
March 2014
February 2014
January 2014
December 2013
November 2013
October 2013
September 2013
August 2013
July 2013
June 2013
May 2013
April 2013
March 2013
January 2013
December 2012
November 2012
October 2012
September 2012
August 2012
July 2012
May 2012
December 2011
November 2011
October 2011
September 2011
August 2011
July 2011
May 2011
Categories
Select Category
Basement
Bathrooms
Bedrooms
Cleaning
Closets
Decorating ideas
Dining Rooms
DIY
Entrance
Featured Blog
Garages
Gardens
Hallways
Home Page Slider
Home Renovations
Homes
How To
Kitchens
Library
Living Rooms
Office
Uncategorized
Find
LED Bulbs
and Interior Decorating Products on DHgate.com